


When storm clouds roll in and the grid goes dark, having reliable backup power brings real peace of mind. But connecting a solar power generator safely to your home’s main breaker panel isn't as simple as plugging in a household appliance. Whether you run a smaller portable backup power setup or a heavy-duty whole home power generator, you need a safe way to transfer power. At Nature’s Generator, we built this guide to answer one big question: should you choose a manual or automatic transfer switch? Here is everything you need to know about wiring, costs, and electrical codes.
In this guide, our team breaks down how transfer switches work, compares manual versus automatic options, walks through a step-by-step DIY installation, and explains National Electrical Code (NEC) rules in plain, simple language.
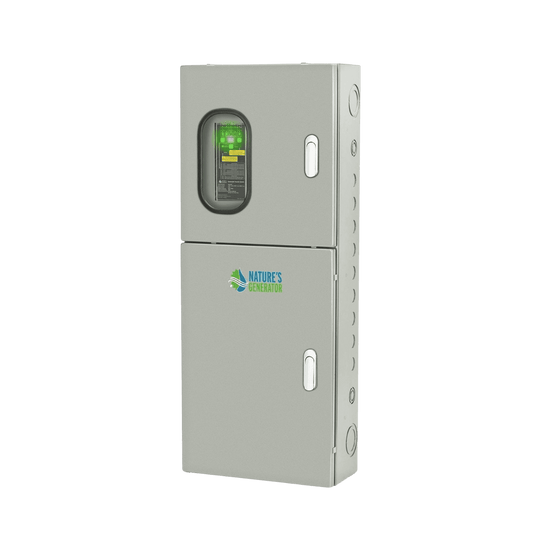
What Is a Transfer Switch and Why Do You Need One for Your Solar Generator?
A transfer switch is a safety device mounted right next to your home's main electrical panel. It switches your household circuits between two different power sources: the utility company's grid and your backup generator. Think of it like a train track switch. It makes sure electricity flows from only one track at a time, keeping power lines safe and protecting your equipment.
How Does a Transfer Switch Stop Dangerous Electrical Backfeeding?
When the power goes out, sending electricity back out into the grid is a huge hazard. In the electrical trade, this is called backfeeding.
If you hook up a generator without an isolating switch, electricity can flow backwards out of your house, through your local utility transformer, and back onto neighborhood power lines. That low voltage from your generator gets stepped up into thousands of volts. This puts utility lineworkers—who are out in the storm trying to fix the lines—in immediate danger of severe shock or electrocution.
There is another big risk: when grid power suddenly snaps back on, electricity rushes into your panel while your generator is still running. That sudden surge will instantly fry your generator’s internal inverter and can easily spark an electrical fire. A transfer switch uses a physical break-before-make connection. It completely disconnects your house from the grid before it connects to your generator, so the two power sources can never collide.
Why Can't You Just Plug a Solar Generator into a Standard Wall Outlet?
You might have heard of people using a double-male plug—often called a "suicide cord"—to plug a generator into an ordinary wall outlet. In our experience, this is one of the most dangerous things you can do in home DIY.
Standard wall outlets are designed to output power, not take power in. Plugging a live generator into an outlet energizes the prongs on the other end, turning them into a bare shock hazard. Plus, standard outlet wiring isn't designed to carry heavy generator loads, creating a severe fire risk. That is why NEC Article 702 strictly forbids backfeeding through wall outlets and requires a dedicated transfer device.
Real-World Example: The Hidden Cost of Skipping an Isolation Switch
Our technical support team frequently hears stories from homeowners who tried temporary workarounds during an emergency. During a winter storm in Michigan, one homeowner tried running electricity into a 120V laundry circuit without a transfer switch. When grid power returned unexpectedly at 240V, the power surge blew out his generator’s control board in less than a second.
Installing a dedicated Nature's Generator Power Transfer Kit prevents this kind of heartbreak. It creates a physical firewall between grid power and your backup investment.
Manual vs. Automatic Transfer Switches: Which One Is Right for Your Home?
Choosing between a manual transfer switch (MTS) and an automatic transfer switch (ATS) comes down to how much hands-on control you want, your system size, and your budget.
How Manual Transfer Switches (MTS) Work
A manual transfer switch is completely mechanical. When grid power drops, you walk over to the switch box and flip a handle or toggle switch from "UTILITY" to "GENERATOR."
-
Zero Battery Drain: Manual switches don't rely on circuit boards or sensors, so they draw zero standby power from your solar batteries.
-
Budget-Friendly: They cost significantly less to buy and install than automatic switches.
-
Total Load Control: You decide exactly which circuits to turn on. This keeps heavy appliances from turning on all at once and overloading your inverter.
-
Simple Reliability: Fewer moving parts mean almost nothing can break down over time.
How Automatic Transfer Switches (ATS) Work
An automatic switch keeps an eye on your utility power around the clock. If grid voltage drops below a safe level, internal relays detect the outage and automatically switch your house over to generator power within seconds.
-
Hands-Free Operation: Keeps critical equipment running even if a storm hits while you are away from home or asleep.
-
Automatic Return: Switches back to grid power as soon as utility service stabilizes.
-
Higher Cost & Setup: ATS units are more expensive and usually require professional installation.
-
Small Parasitic Draw: The sensing electronics consume a tiny amount of electricity continuously (usually 3 to 15 watts). Over time, this small draw can drain smaller solar battery banks if you don't have active solar panels feeding them.
Side-by-Side Comparison
Our Honest Take: Which One Should You Buy?
In our experience, a manual transfer switch is the smartest choice for most portable and mid-sized solar power setups. Because solar power systems store a set amount of battery energy, manual switching lets you control your power consumption carefully during an outage. You can power the fridge first, then switch to lighting or internet when needed.
However, if you own a larger system like the Powerhouse Gen 2 designed to back up central air conditioning and entire panels, an automatic transfer switch provides incredible, seamless convenience.
How Do You Pick the Right Transfer Switch for Your Setup?
To avoid tripping breakers or running into wiring issues, keep these basic electrical factors in mind before picking out equipment.
Matching Amps and Volts (30A vs. 50A, 120V vs. 240V)
Your transfer switch needs to match your solar generator's power outlet:
-
120V 30-Amp Switches (4-Circuit to 6-Circuit): Perfect for standard portable generators. These use a 3-prong or 4-prong 30A plug (like an L5-30 or TT-30) and supply up to 3,600 Watts of continuous power.
-
120V/240V 30-Amp Switches (6-Circuit to 10-Circuit): These use a 4-prong L14-30 plug and give you 7,200 Watts across two hot lines. This setup lets you power both standard 120V outlets and 240V appliances like well pumps.
-
120V/240V 50-Amp Switches (12-Circuit to Whole-House): Designed for high-output systems. They use a NEMA 14-50 plug and can carry up to 12,000 Watts to power major home systems.
Critical Circuit Switches vs. Whole-House Disconnects
A circuit-selective switch controls only specific breakers in your house (like 4, 6, or 10 circuits). This is the safest way to avoid draining your battery bank on non-essential items like hot tubs or clothes dryers. A whole-house switch powers your entire panel, meaning you have to manually turn off individual non-essential breakers yourself.
Floating Neutral vs. Bonded Neutral Made Simple
Every power source has a ground wire and a neutral wire. In some generators, these wires are tied together inside the unit (bonded neutral). In others, they stay separate (floating neutral).
-
Floating Neutral Generators: Most portable solar generators use a floating neutral. You can use a standard transfer switch because the main breaker panel handles the ground connection.
-
Bonded Neutral Generators: If your generator has a bonded neutral, you need a transfer switch that switches the neutral wire alongside the hot wires (a switched-neutral transfer switch). This prevents double-bonding, which trips GFCI breakers and causes electrical noise.
Step-by-Step DIY Wiring Guide: How to Wire a Transfer Switch to Your Solar Generator
Safety First: Working inside a breaker panel involves dangerous voltages. Always turn off the main grid breaker, use insulated tools, and double-check with a reliable voltage meter before touching any wires. If you aren't comfortable with electrical work, we always suggest hiring a certified electrician.
Here is how our engineering team recommends wiring a standard 4-circuit or 6-circuit manual transfer switch to an outdoor inlet box.
Required Tools and Materials
-
Nature's Generator 4-Circuit or 6-Circuit Power Transfer Kit
-
Weatherproof Outdoor Power Inlet Box (NEMA 3R rated)
-
10 AWG or 8 AWG 4-conductor copper wire (THHN/THWN) and flexible conduit
-
Non-contact voltage tester and digital multimeter
-
Wire strippers, pliers, screwdriver set, and wire nuts
Step 1: Mounting the Box and Shutting Off Main Power
Mount your transfer switch box right next to your main electrical panel using sturdy wall anchors. Head to your main panel and turn off the primary utility breaker at the top. Remove the metal cover panel and use a voltage detector on multiple terminals to verify that power is completely off.
Step 2: Running the Wires into Your Main Breaker Panel
Punch out a conduit hole on the side of your main panel and attach a protective conduit connector. Feed the flexible wire harness from the transfer switch into your main panel. Connect the green ground wire from the harness to the panel’s ground bar, and tie the white neutral wire to the neutral bus bar.
Step 3: Connecting Your Critical Household Circuits
Now, pick the essential household circuits you want to run during a blackout (for example: Refrigerator, Kitchen Outlets, Living Room Lights, Sump Pump).
-
Find the target breaker in your main panel (e.g., Circuit 6 for your Refrigerator).
-
Disconnect the existing hot wire (usually black) from that breaker.
-
Connect that disconnected wire to the red wire labeled "Circuit 1" from your transfer switch using an approved wire nut.
-
Take the black wire labeled "Circuit 1" from your transfer switch and push it directly into the breaker terminal where the original wire was.
-
Repeat this process for every circuit you want to back up, making sure you match 15-amp switches to 15-amp breakers and 20-amp switches to 20-amp breakers.
Step 4: Installing the Outside Inlet Box and Running Your First Test
Mount your outdoor inlet box on an exterior wall where you plan to park your solar generator. Run heavy-duty copper wire through conduit from the transfer switch over to the inlet box, matching hot, neutral, and ground wires to the correct terminals.
To test your new setup:
-
Make sure all transfer switch toggles are set to "LINE" (Utility grid).
-
Put your main panel cover back on and flip the main utility breaker back ON.
-
Run a heavy-duty generator cord from your Nature's Generator solar system to the outdoor inlet box.
-
Turn on your solar generator's AC output.
-
Flip your selected transfer switch toggles from "LINE" to "GEN." Your essential home appliances should turn on instantly using clean battery power!
"Installing our Nature's Generator transfer kit was way easier than I expected. I wired our fridge, pellet stove, lights, and Wi-Fi router in about two hours. Now, when winter storms hit Oregon, I just flip four switches and we have silent solar power without running cables through open windows."
What Electrical Code (NEC) Rules Do You Need to Follow?
Staying compliant with electrical codes isn't just about passing inspections—it keeps your home insurance valid and your family safe.
Key Code Articles Made Simple
-
NEC Article 702 (Optional Standby Systems): This covers backup systems that aren't strictly required by law for life safety. It requires an approved transfer switch to prevent grid and generator power from mixing.
-
NEC Article 705 (Interconnected Sources): Applies if your battery system operates alongside grid solar power.
-
NEC Article 250 (Grounding and Bonding): Sets strict rules for ground wires to protect you from shock hazards.
Permits, Load Calculations, and Passing Inspection Without Stress
Before starting, check in with your local permitting office (what electricians call the AHJ, or Authority Having Jurisdiction). Most cities require a simple electrical permit for transfer switch work. Make sure to calculate your home's power needs beforehand to prove that your solar generator can handle the starting and running watts of your connected appliances. For more detailed guides and engineering specs, check out our Nature's Generator blogs.
What Are the Most Common Setup Issues and How Do You Fix Them?
If your setup isn't working as expected, here are quick fixes for common issues:
-
GFCI Breaker Keeps Tripping: This usually means your system has two neutral-ground bonds. If your generator has a bonded neutral, make sure you are using a switched-neutral transfer switch.
-
Appliances Lose Power Under Heavy Load: If you use a thin extension cord over long distances, you will get a voltage drop. Always use heavy 10-gauge or 8-gauge cords between your generator and power inlet box.
-
Simple Maintenance Rule: Every six months, inspect your outdoor inlet box for debris, switch the toggles back and forth to keep them moving smoothly, and run a 15-minute test under battery power.
Conclusion
Installing a transfer switch is the safest, most reliable way to connect a solar generator to your home. Whether you opt for a manual transfer switch for straightforward, zero-power-loss control or an automatic transfer switch for seamless power during outages, you create a code-compliant setup that completely eliminates backfeeding risks. Following standard wiring steps ensures your household stays safe and comfortable through any blackout.
When you are ready to build a complete home backup system, explore how Nature's Generator combines high-capacity solar power with easy-to-install transfer hardware.


